Candy Dish

Follow me here too!

Like what you see? Then follow me!

Saturday, December 31, 2011

HAPPY NEW YEAR'S EVE...

Greetings!

As this year comes to a close, I would like to take a moment to THANK all my e-buddies out there.  I pray that the New Year brings you peace, love, joy and prosperity!

Here's a few cards to share with you from ADFD's December Club Kit release.  You will LOVE them, I promise.  The club is an easy inexpensive way to get lots of Tammy's goodies all neatly packaged especially for you.


Each month you will receive one club KIT containing all new stamps. Each KIT contains no less than 10 themed digital stamp illustrations, over a 40$ value in A Day For Daisies images!

On the second Friday of every month, you will receive notification that your KIT is ready. You can then hop over to the exclusive CLUB store and pick it up under the category “CLUB KITS”! If the KIT for that month doesn’t particularly inspire you, you can choose to forgo that months KIT for a past release. Past releases include the images that are released on Fridays to the public. This way, if you fall in love with a new release collection, and just have to have it…you can! You will be granted 4 passes a year. The CLUB is about YOU and I want you to love your stamps!

Enjoy 50% off regular prices in the CLUB STORE every day! Be sure to check the “CLUB FREEBIES” category often! This section is stuffed with freebies and new ones are added each month!You can check out the kit here.  As you can see these kits are packed with lots of awesome digis. 

Now get to creating...


Remember:  There are no mistakes in cardmaking, only opportunities for creativity!

Friday, December 23, 2011

ADFD New Release: Giving Love

Greetings!

This is a super quick post, because I have a ton of last minute things to do.  How many of you out there celebrate Christmas on Christmas Eve and chill on Christmas?  I just found out that several people do this and me and my sisters are thinking we may adopt this tradition. :-)  I have banana pudding to make, candy bags to stuff and gifts to take to my sister to wrap. lol  Okay, enough gibberish and on to the task at hand.

Today I bring to you the new release from ADFD entitled "Giving Love."  How appropriate for the season, huh?  I am using Sewing a Stitch.  I decided to digitally paper piece her pillows and blanket and then I used Copics to color the rest.


Don't forget, you can pick these precious images up from the ADFD store (along with the entire set).  There will not be a challenge this week.  You can also check us out on FB, CDAC, PCP, and the Crafter's Cafe.


HAVE A BLESSED AND SAFE CHRISTMAS HOLIDAY!!


Now get to creating...


Remember: There are no mistakes in cardmaking, only opportunities for creativity!

Wednesday, December 21, 2011

Sock Monkey Gift card holder

Greetings!

Just stopping by for a quick post.  I am busy putting last minute gifts together.  I met with my BFF today to exchange gifts and she LOVES sock monkeys.  Therefore, I had a gift card for her and decided to create this adorable sock monkey gift card holder to put it in.


It was really easy to put together and only took me a few minutes once I decided on how to do it. lol  I basically measured the gift card and cut the cardstock so that it would wrap all the way around it.  I also measured about a 2" from the bottom, scored it and folded it up into a pocket for the gc.  I then added dp and stamped a saying on the front (in the future I would probably make a computer generated tag or banner instead of using a stamp). 

Once I had the holder part put together, I decided on how I was going to make the monkey.  I used the following items:


I cut out the larger circle in a dark brown cardstock, then cut out a heart and a small oval for his face and ears.  His mouth was cut out using the two oval diecuts and I knew that sock monkeys usually have red and white mouths.  His hat was created using half of the smaller circle and a button.  I then assembled him, added some pop dots and (walah!) my monkey was complete.  She loved her sock monkey gc holder and now I am working on another one using a different animal.  I will post depending on how it turns out. lol

Now get back to Christmas shopping, cooking, wrapping...


Remember:  Santa knows whether you've been naughty or nice!
Pin It  Pinterest is a cool place to share your creations, get inspiration and gain a ton of weight just looking at all the food pictures. lol  Check it out here -------------------->

Friday, December 16, 2011

ADFD New Release - All Wrapped Up - Puppy Love

Greetings!

UPDATE:  This is my 300th post!  Woohoo! 

I am sure everyone is running around trying to get that last minute Christmas shopping done.  I did a little last night, but really gotten in to the Christmas spirit yet.  I purchased Michael Buble new Christmas CD which is sure to help.  Well, I am here to share with you the latest new release from ADFD and they are adorable.  I chose to work with a box full of puppies.  However, I just didn't think a box full of puppies was enough so merged an older image from Tammy called "Picking a Puppy."  I think these are a perfect pairing. 


Recipe: 
Images:  ADFD "Box full of puppies" and "Picking a Puppy"
Sentiment:  ME!
Paper:  SU
Ink:  Copics

Don't forget, you can pick these precious images up from the ADFD store (along with the entire set). While you are there color one of them up and enter your creation in our "Anything Goes" challenge for a chance to win a $12 store credit. You can also check us out on FB, CDAC, PCP, and the Crafter's Cafe.

Now get to creating...
Remember: There are no mistakes in cardmaking, only opportunities for creativity!

Friday, December 9, 2011

ADFD New release "Mechanical Animals" and Anything Goes Challenge

Greetings!

Happy Friday, I am here to share with you the new release for ADFD.  Tammy has created some fun images to play with.  I chose the mechanical snake and decided to make it in to a fun child toy. 


I digitally paper-pieced the snake, cut it out, and attached the parts with brads.  I attached the snake onto a popsicle that I had wrapped with ribbon.  I colored his spots with gels pens and added a tongue. He's a lot of fun to play and a blast to put together.

Don't forget, you can pick these precious images up from the ADFD store (along with the entire set). While you are there color one of them up and enter your creation in our "Anything Goes" challenge for a chance to win a $12 store credit. You can also check us out on FB, CDAC, PCP, and the Crafter's Cafe.

Now get to creating...
Remember: There are no mistakes in cardmaking, only opportunities for creativity!

Thursday, December 8, 2011

EarthArt International - How's it hanging?

Greetings!

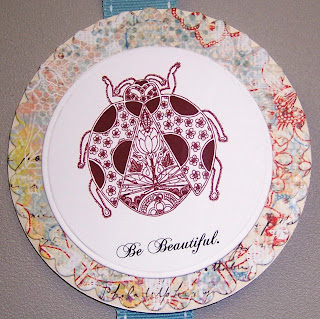
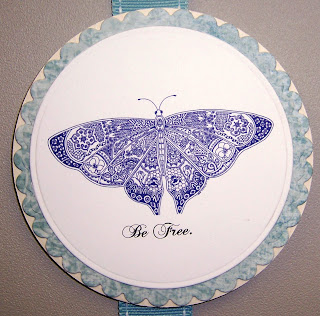
How is it hanging?  Today I am sharing with you some wall (or door) hangings I created using images from EarthArt International which you can find over at the Scrap Orchard.  I have been working with EarthArt International's intricate animals for a while now and decided to pull several of them together to create a project other than a card.


This wall hanging was oober easy to make.  I had inherited (from a friend moving out-of-state) a ton of round coasters.  I simple punched a scallop circle out of dp and affixed them to each circle, colored the images on the computer and added the cinnaments.  I then cut a long piece of ribbon and used heavy tape to adhere them to the ribbon.  For the first coaster, I punched a hole through it to stick a thumb tack in it and hang it up.  Really easy to make and truly so many possibilities.


This creation was a little more involved.  I left the butterfly image black and added a pink overlay in the background.  I then finished it off with this cool wordart "just fly above it all," because don't we need to just do that sometimes?  The image, overlay and wordart can all be found on Scrap Orchard.  I mounted that on paper from SU and cardstock from Core'dinations.  I added a couple of black eyelets adn ran pink ribbon through it.  The diectuts are from Spellbinders.  I think this little plaque would be a good to hang in your office to remind you that you should just rise above life's drama.

Well, that is all I have to share with you today.  If you haven't checked out EarthArt images or Scrap Orchard you should do so.

Now get to creating...


Remember:  There are no mistakes in cardmaking, only opportunities for creativity!

Wednesday, December 7, 2011

CAS-Christmas Cards

Greetings!

Happy Hump Day!  This week is flying by and soon I will be off work for 2 weeks!!  Can't wait...got lots to do.  Keeping up with my little challenge to myself, I am sharing a couple very simple Christmas cards with you today.  I used 3 basic ingredients for each card...embossing folder, stickles and ribbon.


I even used the same Winter scene embossing folder for both which is a Cuttlebug folder.  I think the one with the red ribbon is my favorite because it really pops with the white on white.  I was playing around and whipped these up.  I will probably send them out to somone (if I remember).  I am terrible at making cards for the Holidays and forgetting to get them in the mail. lol  I end up finding them in the Summer and putting them someplace for safekeeping and forgetting where that place was when time comes to send them.  I know...I have issues. :-)

Now get to creating...


Remember:  There are no mistakes in cardmaking, only opportunities for creativity!

Monday, December 5, 2011

We all FALL down...

Greetings!

I am going to post everyday this week to see if I can do it. lol  Today I bring you a couple cards with the theme of "Fall."  Not necessary the season, but the action of falling.  I was playing around with some digis and wanted to capture the act of a feather dropping or a boy jumping and the following are what I came up with.

I took a slightly different approach with each image.  With the ADFD image above of the boy jumping into leaves, I had to do a little cropping to just get the boy by himself without the leaves.  Once, I had the little guy isolated, I lightened him up a couple times and staggered him on the page.  I then colored him up, affixed some cool leaf paper from SU and walah!  He looks like he took a running start for those leaves and I captured him mid jump. lol


With the feather (not sure where I got this from) I just lightened it up and made it appear to be floating down.  I could have added one more feather up above, but for some reason working in 3s worked for me.  I lightly colored the leaf and added a cinnament designed by ME! 

In order to create this illusion of falling, copy your image 3 times (or how many times you like) in MSWord.  Next you want to change the color of two of your images as illustrated below.  This change in color makes the image appear that it is just leaving a trail as it falls.


This is the same thing you would do with a rubberstamp.  Stamp the image first with enough ink on the pad and then as you go along stamp it on an extra sheet of paper to remove some of the ink before stamping it on your cardstock.  Well, anyway this is a neat little trick I discovered (you probably already know about it), but for those of you that didn't know you should give it a try.

Now get to creating...


Remember:  There are no mistakes in cardmaking, only opportunities for creativity!

*NEW* Scrapper's Delights "Angelic Christmas" Challenge

Greetings!

Hope your Monday is going well!  I am here to share with you this month's challenge over on Scrapper's Delights.  Janice has put together a heavenly challenge using a variety of beautiful angels.  I love angels and actually collect them (over a 100+) in every different form (ceramic, wood, metal, etc.).  I figure if I could surround myself with anything, angels would be my best bet.

Here's my creation using the beautiful angel.  I think she would be perfect atop a Christmas tree.  Do you put a star or angel on top of your tree?  I don't put up a tree since it's just me, but I pull out almost all my angels around this time of year. :-)


I kept it really simple.  I embossed the black cardstock and used light colors for the image itself.  I believe she is so pretty and doesn't need too much added to her. 

Recipe:
Ink:  Copics
Cardstock:  SU
Sentiment:  ME
Embosser:  Cuttlebug Embossing folder

NEW RULES FOR THIS MONTH
OK this month is going to be a little different you can submit any project that fits this months theme Christmas/Winter and you do not have to include a product or freebie from me, but you only have one chance of winning if you don't use one of my images.
 
Here is how you can get up to 2X the chance of winning with each entry:

1st chance:
Everyone that submits a project is valid as long as they base it ound the general theme for the month which is Christmas/Winter/.

*2nd Chance
Include a product made by me in your creation (paid or freebie) based on the general theme for the month which is Christmas/Winter.

*if you have qualified for a second chance in winning you will need to submit your entry twice so the random.Org will  generate the correct chances for you XXX

Special Gift ???
If you use one of my new Angel Themed Products in your creation you will be getting an email with a sweet Xmas gift from me XXX

I hope that you will join us for this awesome challenge and a chance to win a $10 shopping spree at the store.   The challenge ends December 31, 2011.
 
 
Now get to creating...


Remember:  There are no mistakes in cardmaking, only opportunities for creativity!

Saturday, December 3, 2011

Digital Paper-piecing 101

Greetings!

I hope everyone is having a safe and fun Saturday evening.  After posting my ADFD card on Friday where I digitally paper-pieced the chair, I've had a few people inquire about digital paper-piecing.  Well, I've been digitally paper-piecing for a little bit now and have always used Microsoft Word.  However, about a year ago I purchased PSE (Photoshop Elements) and now I do all my digital paper-piecing using this program.  I am currently working on a tut to show everyone how to do it for the blog Crafting Start.  I will also post it here on my blog for your convenience so be on the look out for it. 

However, for now I will share the basics with you.  Please note that this is how I do it and like everything there are always several ways to skin a cat (as the saying goes).  First of all digital paper-piecing is exactly like regular paper-piecing (only your using a computer).  You should have an image with plenty of white space.  Tammy's images from ADFD are always great to use for paper-piecing projects because her images usually have plenty of space to play.

I used four different papers to create my sofa and probably could have used 5!  That brings me to the second key to paper-piecing.  You should choose really good quality papers.  I have always struggled with matching paper patterns and colors up. However, I read in one of my cardmaking magazines that the key to doing this is buying papers in packs.  These packs already have multiple patterns with like colors grouped together.  This was truly a lifesaver for me and you can find companies like Shery K Designs and Echo Park Papers that offer paper packs digitally at reasonable prices.  This chair was created using papers from Shery K Designs and I must say I LOVE her papers.  They are the same quality you find in the regular paper packs, at excellent prices and beautiful designs.  NOTE:  I do not have any affliation with these companies so this is just my opinion.  If you have a company that you love, please let me know I would love to check them out.  I am obessessed with paper (digital and regular).

The next key to digital paper-piecing is the software program you use.  As I mentioned previously I use PSE mainly, but have used MS Word.  I created a tut on using MS Word to paper-piece which you can find here.  The main reason that I use PSE over MS Word is because I am able to crop the paper to fit the image perfectly, print it and affix it to my card.  In MS Word, I've found that it is not easy (may not even be possible) to make it fit the image exactly.  You will find several tuts on digital paper-piecing.  The hardest working woman in the blogosphere, Arielle Gordon has created this tut on digital paper-piecing using Pixlr in Windows (which is similar looking to PSE). :-) 

Well, I hope that this helps you (*smile* Dorcas) get a handle on digital paper-piecing, which will save you time, money and space.  I can sit in front of the television and paper-piece several images and save them for future use.  If you have the right image, quality papers, and the right program you can can be a paper-piecing crazy person like me! lol 

Now get to piecing,


Remember:  There are no mistakes in card making, only opportunities for creativity!

Friday, December 2, 2011

ADFD New Relase ~Cozy~Best Friends

Greetings!

Boy oh boy am I behind!  I feel like someone has pushed turbo drive on my days and they are flying bye. There doesn't seem to be enough time to do all the things running through my head.  Oh well, I will make the most of what I have.

I come to you today to share the New Release from ADFD titled "Cozy."


I love this image, because I love to read and there is nothing better than cuddling up on a comfy chair with a good book...and a good friend. :-)  I digitally paperpieced the chair and used Copics to color the little girls hair, skin and shoes.  I did not intentionally forget to color their clothes.  I actually got distracted and ran out of time so I just went with it.  I like how it turned out.  Also, I added the sentiment "Book.Friends.Forever." 

Recipe:
Image:  ADFD
Sentiment:  ME!
Cardstock:  SU, Core'dinations
Diecut:  Spellbinder's Squares

Don't forget, you can pick these precious images up from the ADFD store (along with the entire set). While you are there color one of them up and enter your creation in our "Color" challenge for a chance to win a $12 store credit. You can also check us out on FB, CDAC, PCP, and the Crafter's Cafe.

Now get to creating...
Remember: There are no mistakes in cardmaking, only opportunities for creativity!

Friday, November 25, 2011

ADFD New Release "Under the Sea" and Color Challenge

Greetings!

Happy Day after Thanksgiving!  I hope that you had a blessed and safe Turkey Day.  If you were brave enough to venture out in the crazy shopping world, I hope that you found great deals and managed not to get hurt.  I use to be brave soul and do the whole "Black  Friday" thing; however, now since I am approaching 40 (fast) my bones can't take the whole shoving around...excuse me...pardon me...I saw that first craziness of it all.  Soooo, I do all my shopping from my cute lil' computer. :-)

Well, on to this week's ADFD new release and challenge post.  Tammy decided to take us on an underwater adventure with this week's release.  Also, this is challenge week so we will be using beautiful colors of the sea to create with. 


I really like how this turned out.  The colors are a FAB choice and everything ties together well.  You should check out the cuties in this set.  She has some oober cute mermaids and beautiful Koi fish.  Wait until you see what the other DTs did with these images...just adorable!

Recipe:
Image:  ADFD "Under the Sea" new release
DP:  Sorry.  I lost my strip that tells me who made this paper :-(
Cinnament:  By ME!
Ink:  Copics
Cardstock:  SU

As usual, you can pick these precious images up from the ADFD store (along with the entire set). While you are there color one of them up and enter your creation in our "Color" challenge for a chance to win a $12 store credit. You can also check us out on FB, CDAC, PCP, and the Crafter's Cafe.

Now get to creating...
Remember: There are no mistakes in cardmaking, only opportunities for creativity!

Monday, November 21, 2011

Scrapper's Delight Draco Dragon and Creative Team Call

Greetings!

I hope your week is starting out well.  I want to share with you another image using Scrapper's Delight's Draco the Dragon.  This adorable dragon is busy preparing for the Holiday Season like so many of us.


He's pulling out his Christmas bulbs to hang on his tree.  You can pick this (and other) adorable digi up at the Scrapper's Delight store.  If you hurry, you can enter him in the challenge to win a ton of cool prizes.  The challenge is a monthly challenge, which ends on November 30, 2011.

UPDATE:

Janice is having a Creative Team call!  If you are interested in playing with some awesome images, having fun and meeting a cool group of ladies then sign up. 


Now get to creating...


Remember:  There are no mistakes in card making, only opportunities for creativity!

Friday, November 18, 2011

ADFD New Release "Giving Thanks"

Greetings!

It's Friday and time for another new release from ADFD.  I can't believe the last time I posted was last Friday.  I have been all kinds of busy as I am sure everyone is around this time.  I have been working on some tuts, projects for the upcoming Ready, Set, Create magazine I design for (which will feature ADFD) and getting ready for my graduation on December 10th.  Sooo, lots to do. 

Anyways, I made a fun creation using two of Tammy's pumpkin scene images. 


I've shown you several pictures of this creation, because it opens from the top and then the side.  I thought that it would make a cute mini scrapbook or brag book.  I used the images again with the words "Thanks" and "Giving."  I love the way it turned out and that pop of orange throughout really makes it stand out.  I paper pieced the little children's clothes as well as the doggie.  I like to combine digital paperpiecing with coloring.  The sentiment on this creation reads, "Celebrate the season of Thanks with the spirit of giving." 

Recipe:
Images:  ADFD "Giving Thanks"
Sentiment:  ME!
DP:  SU and Shery K.
Cardstock:  Co'ordinations
Diecuts:  Spellbinder's Square

As usual, you can pick these precious images up from the ADFD store (along with the entire set). While you are there color one of them up and enter your creation in our "Flocking" challenge for a chance to win a $12 store credit. You can also check us out on FB, CDAC, PCP, and the Crafter's Cafe

Now get to creating...


Remember:  There are no mistakes in cardmaking, only opportunities for creativity!

Sue Nelson and I

Sue Nelson and I
2009 Rubber Stamp Convention